Сергей Ваткин - DirectX 8. Начинаем работу с DirectX Graphics

- Название:DirectX 8. Начинаем работу с DirectX Graphics
- Автор:
- Жанр:
- Издательство:неизвестно
- Год:неизвестен
- ISBN:нет данных
- Рейтинг:
- Избранное:Добавить в избранное
-
Отзывы:
-
Ваша оценка:
Сергей Ваткин - DirectX 8. Начинаем работу с DirectX Graphics краткое содержание
DirectX 8. Начинаем работу с DirectX Graphics - читать онлайн бесплатно полную версию (весь текст целиком)
Интервал:
Закладка:
switch (msg) {
case WM_DESTROY:
PostQuitMessage(0);
return 0;
}
return DefWindowProc(hWnd, msg, wParam, lParam);
}
INT WINAPI WinMain(HINSTANCE hInst, HINSTANCE, LPSTR, INT) {
WNDCLASSEX wc = {
sizeof(WNDCLASSEX), CS_CLASSDC, MsgProc, 0L, 0L,
GetModuleHandle(0), 0, 0, 0, 0, "FirstDX_cl", 0
};
RegisterClassEx(&wc);
// Создание главного окна приложения
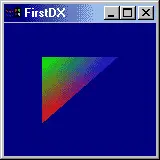
HWND hWnd = CreateWindow("FirstDX_cl", "FirstDX",
WS_OVERLAPPEDWINDOW, 100, 100, 160, 160,
GetDesktopWindow(), NULL, wc.hInstance, NULL);
if (Init(hWnd)) {
ShowWindow (hWnd, SW_SHOWDEFAULT);
UpdateWindow(hWnd);
MSG msg;
ZeroMemory(&msg, sizeof(msg));
while (msg.message != WM_QUIT) {
if (PeekMessage(&msg, NULL, 0U, 0U, PM_REMOVE)) {
TranslateMessage(&msg);
DispatchMessage(&msg);
} else Render();
}
}
ReleaseAll();
UnregisterClass("FirstDX_cl", wc.hInstance);
return 0;
}
Функция Render() вызывается всегда, когда не приходят какие-либо сообщения, то есть перерисовка кадра происходит практически постоянно. Функции Init() и ReleaseAll() описаны в предыдущей части урока.
Теперь есть всё, чтобы вы смогли скомпилировать и запустить наш пример. Не забудьте добавить библиотеку d3d8.lib в ваш проект, чтобы линковщик смог найти реализации функций Direct3D.
Поведал: Ваткин.
GameDev.net
2D Rendering in DirectX 8
I have been reading alot of questions lately related to DirectX 8 and the exclusion of DirectDraw from the new API. Many people have fallen back to DX7. I can understand people using DX7 if they have alot of experience with that API, but many of the questions seem to be coming from people who are just learning DX, and they are stuck learning an old API. People have argued that many people don't have 3D hardware, and therefore D3D would be a bad alternative for DirectDraw. I don't believe this is true - 2D rendering in D3D requires very little vertex manipulation, and everything else boils down to fillrate. In short, 2D rendering in D3D on 2D hardware should have pretty much the same performance as DirectDraw, assuming decent fillrate. The advantage is that the programmer can learn the newest API, and performance on newer hardware should be very good. This article will present a framework for 2D rendering in DX8 to ease the transition from DirectDraw to Direct3D. In each section, you may see things that you don't like ("I'm a 2D programmer, I don't care about vertices!"). Rest assured, if you implement this simple framework once, you'll never think about these things again.
Assuming you have the DX8 SDK, there are a couple tutorials that present how to create a D3D device and set up a render loop, so I don't want to spend alot of time on that. For the purposes of this article, I'll talk about the tutorial found in [DX8SDK]\samples\Multimedia\Direct3D\Tutorials\Tut01_CreateDevice, although you can add it to anything. To that sample, I'll add the following functions:
void PostInitialize(float WindowWidth, float WindowHeight) — this function is called by the app after everything else is set up. You've created your device and initialized everything. If you're following along with the Tutorial code, WinMain looks like this:
…
if (SUCCEEDED(InitD3D(hWnd))) {
PostInitialize(200.0f, 200.0f);
// This is my added line. The values of
// 200.0f were chosen based on the sizes
// used in the call to CreateWindow.
ShowWindow(hWnd, SW_SHOWDEFAULT);
…
void Render2D() — This function is called each time you want to render your scene. Again, the Render function of the Tutorial now looks like this:
VOID Render() {
if (NULL == g_pd3dDevice) return;
// Clear the backbuffer to a blue color
g_pd3dDevice->Clear(0, NULL, D3DCLEAR_TARGET, D3DCOLOR_XRGB(0,0,255), 1.0f, 0);
// Begin the scene
g_pd3dDevice->BeginScene();
Render2D(); //My added line…
// End the scene
g_pd3dDevice->EndScene();
// Present the backbuffer contents to the display
g_pd3dDevice->Present(NULL, NULL, NULL, NULL);
}
OK, that's our shell of an application. Now for the good stuff…
NOTE: This is where we start talking about some of the nasty math involved with D3D. Don't be alarmed - if you want to, you can choose to ignore most of the detailsЕ Most Direct3D drawing is controlled by three matrices: the projection matrix, the world matrix, and the view matrix. The first one we'll talk about is the projection matrix. You can think of the projection matrix as defining the properties of the lens of your camera. In 3D applications, it defines things like perspective, etc. But, we don't want perspective - we are talking about 2D!! So, we can talk about orthogonal projections. To make a long story very short, this allows us to draw in 2D without all the added properties of 3D drawing. To create an orthogonal matrix, we need to call D3DXMatrixOrthoLHand this will create a matrix for us. The other matrices (view and world) define the position of the camera and the position of the world (or an object in the world). For our 2D drawing, we don't need to move the camera, and we don't want to move the world for now, so we'll use an identity matrix, which basically sets the camera and world in a default position. We can create identity matrices with D3DXMatrixIdentity. To use the D3DX functions, we need to add:
#include
and add d3dx8dt.lib to the list of linked libraries. Once that was set up, the PostInitialize function now looks like this:
void PostInitialize(float WindowWidth, float WindowHeight) {
D3DXMATRIX Ortho2D;
D3DXMATRIX Identity;
D3DXMatrixOrthoLH(&Ortho2D, WindowWidth, WindowHeight, 0.0f, 1.0f);
D3DXMatrixIdentity(&Identity);
g_pd3dDevice->SetTransform(D3DTS_PROJECTION, &Ortho2D);
g_pd3dDevice->SetTransform(D3DTS_WORLD, &Identity);
g_pd3dDevice->SetTransform(D3DTS_VIEW, &Identity);
}
We are now set up for 2D drawing, now we need something to draw. The way things are set up, our drawing area goes from —WindowWidth/2 to WindowWidth/2 and -WindowHeight/2 to WindowHeight/2. One thing to note, in this code, the width and the height are being specified in pixels. This allows us to think about everything in terms of pixels, but we could have set the width and height to say 1.0 and that would have allowed us to specify sizes, etc. in terms of percentages of the screen space, which would be nice for supporting multiple resolutions easily. Changing the matrix allows for all sorts of neat things, but for simplicity, we'll talk about pixels for nowЕ Setting Up a 2D "Panel"
When I draw in 2D, I have a class called CDX8Panel that encapsulates everything I need to draw a 2D rectangle. For simplicity, and it avoid a C++ explanation, I have pulled out the code here. However, as we build up our code to draw a panel, you'll probably see the value of such a class or higher level API if you don't use C++. Also, we are about to recreate much that goes on in the ID3DXSprite interface. I'm explaining the basics here to show the way things work, but you may want to use the sprite interface if it suits your needs.
My definition of a panel is simply a 2D textured rectangle that we are going to draw on the screen. Drawing a panel will be extremely similar to a 2D blit. Experienced 2D programmers may think that this is a lot of work for a blit, but that work pays off with the amount of special effects that it enables. First, we have to think about the geometry of our rectangle. This involves thinking about vertices. If you have 3D hardware, the hardware will process these vertices extremely quickly. If you have 2D hardware, we are talking about so few vertices that they will be processed very quickly by the CPU. First, let's define our vertex format. Place the following code near the #includes:
struct PANELVERTEX {
FLOAT x, y, z;
DWORD color;
FLOAT u, v;
};
#define D3DFVF_PANELVERTEX (D3DFVF_XYZ | D3DFVF_DIFFUSE | D3DFVF_TEX1)
This structure and Flexible Vertex Format (FVF) specify that we are talking about a vertex that has a position, a color, and a set of texture coordinates.
Now we need a vertex buffer. Add the following line of code to the list of globals. Again, for simplicity, I'm making it global — this is not a demonstration of good coding practice.
LPDIRECT3DVERTEXBUFFER8 g_pVertices = NULL;
Now, add the following lines of code to the PostInitialize function (explanation to follow):
float PanelWidth = 50.0f;
float PanelHeight = 100.0f;
g_pd3dDevice->CreateVertexBuffer(4 * sizeof(PANELVERTEX), D3DUSAGE_WRITEONLY,
D3DFVF_PANELVERTEX, D3DPOOL_MANAGED, &g_pVertices);
PANELVERTEX* pVertices = NULL;
g_pVertices->Lock(0, 4 * sizeof(PANELVERTEX), (BYTE**)&pVertices, 0);
//Set all the colors to white
pVertices[0].color = pVertices[1].color = pVertices[2].color = pVertices[3].color = 0xffffffff;
//Set positions and texture coordinates
pVertices[0].x = pVertices[3].x = -PanelWidth / 2.0f;
pVertices[1].x = pVertices[2].x = PanelWidth / 2.0f;
pVertices[0].y = pVertices[1].y = PanelHeight / 2.0f;
pVertices[2].y = pVertices[3].y = -PanelHeight / 2.0f;
pVertices[0].z = pVertices[1].z = pVertices[2].z = pVertices[3].z = 1.0f;
pVertices[1].u = pVertices[2].u = 1.0f;
pVertices[0].u = pVertices[3].u = 0.0f;
pVertices[0].v = pVertices[1].v = 0.0f;
pVertices[2].v = pVertices[3].v = 1.0f;
g_pVertices->Unlock();
This is actually much simpler than it may look. First, I made up a size for the panel just so we'd have something to work with. Next, I asked the device to create a vertex buffer that contained enough memory for four vertices of my format. Then I locked the buffer so I could set the values. One thing to note, locking buffers is very expensive, so I'm only going to do it once. We can manipulate the vertices without locking, but we'll discuss that later. For this example I have set the four points centered on the (0, 0). Keep this in the back of your mind; it will have ramifications later. Also, I set the texture coordinates. The SDK explains these pretty well, so I won't get into that. The short story is that we are set up to draw the entire texture. So, now we have a rectangle set up. The next step is to draw it…
Читать дальшеИнтервал:
Закладка: